Stardew Valley Farm Layout Guide — Profit & Flow (1.6)
Optimize your Stardew Valley 1.6 farm layout for max profit: crop placement, sprinkler systems, artisan sheds, and animal areas — a practical layout guide.
Your farm layout isn't just about making it look pretty; it directly impacts your daily efficiency, how much gold you make, and how quickly you progress. A well-planned farm means less wasted time running around, more productive plots, and a smoother path to a fully automated farm.
The biggest mistake new farmers make is not planning. You end up planting too much, hand-watering until you pass out, and losing precious time. This guide offers optimal strategies for each farm type, from early game setup to maximizing your profit with artisan goods in the late game.
Quick Summary
- Year 1 Focus: Maximize tillable space for seasonal crops, prioritize Quality Sprinklers.
- Animal Zones: Keep barns and coops together for easy feeding and collection.
- Artisan Sheds: Dedicate sheds to Kegs and Preserves Jars for processing.
- Tree Tapping: Place tappers on trees in designated areas for resin/syrup.
- Pathways: Use paths to connect key areas for faster movement and aesthetic appeal.
Understanding Your Farm Map
Your starting farm map dictates the terrain and available resources. Plan your layout around its strengths:
| Map Name | Strengths for Layout | Considerations |
|---|---|---|
| Standard Farm | Largest open space, maximum tillable tiles. Ideal for massive crop fields. | No unique resources. Can feel empty early on. |
| Forest Farm | Daily Hardwood from stumps, free forageables. Excellent for early game resource gathering. | Less tillable space. Terrain can be a bit cluttered. |
| Riverland Farm | Fishing spots directly on farm, island aesthetic. | Very limited tillable space. Awkward for large crop fields. |
| Hill-top Farm | Small quarry for daily stone/ore. | Varied elevation makes planning tricky. Less flat ground. |
| Wilderness Farm | Monsters spawn at night (if activated). | Similar to Standard but with monster mechanic. |
| Four Corners Farm | Four distinct quadrants. Great for organized layouts or multiplayer. | Natural barriers separate zones. |
| Beach Farm | Unique forage, supply crates. Beautiful ocean view. | Sprinklers don't work on sand. Very challenging for crops. |
| Meadowlands Farm (1.6) | Starts with Coop + 2 Chickens, faster grass growth. | Limited tillable space. Ideal for animal-focused farms. |
Tip: If you're a new player, Standard or Forest Farm are the most forgiving. Standard offers raw space, while Forest gives valuable early game resources.
Year 1: Foundation Layout (Standard Farm Example)
The goal in Year 1 is efficiency and resource management. Don't aim for perfection; aim for function.
Spring Priorities
- Clear a 15x15 Plot: Focus on clearing a rectangular area near your farmhouse.
- Chest Placement: A chest right outside your door saves endless trips. Also, keep one near the mine entrance.
- Silo First: Build a Silo (100g + 100 Stone + 10 Clay + 5 Copper Bar) before scything any grass. This ensures free Hay for animals.
- Scarecrow: Place your first Scarecrow in the center of your crop field to protect a 17x17 area.
- Paths to Water: Use clear paths to the nearest pond or river for efficient hand-watering.
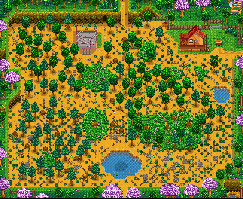
Summer Expansion
- Quality Sprinklers: These are your biggest efficiency boost. Craft 5-10 and use them to expand your watering radius. They cover an 8-tile (3x3) area.
- Animal Buildings: Build your first Coop. Place it near a grassy area where you can let animals graze.
- Lightning Rods: Place 5-10 along the edges of your farm or even in other map sections (like the bus stop) to start collecting Battery Packs.
- Tree Farm: Designate a section for planting trees (Oak, Maple, Pine) for later tapping.
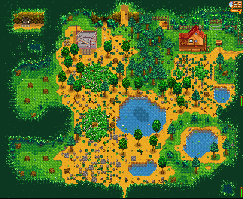
Fall Optimization
- Upgrade Barn/Coop: Aim for Deluxe upgrades to get Pigs (for Truffles) and Rabbits (for Rabbit's Foot).
- Artisan Shed: Build a Shed and fill it with Kegs and Preserves Jars. This centralizes processing.
- Fruit Trees: Plant Apple and Pomegranate trees in your greenhouse or designated farm area for the Community Center Artisan Bundle.
- Iridium Sprinklers: Start acquiring Iridium Bars for these. They water a 5x5 area and are the best automation tool.
Late Game: Max Profit & Aesthetics
Once you have the Greenhouse unlocked and Iridium Sprinklers, your focus shifts to maximizing artisan goods and making your farm beautiful.
Artisan Processing Hub
Fill large sheds with Kegs and Preserves Jars. A typical large shed can hold 137 machines. This allows you to process hundreds of crops into high-value wine or jelly.
- Wine Production: Plant Ancient Fruit in your Greenhouse and pipe it all into Kegs.
- Cheese/Mayo Production: Keep your Barns and Coops separate but close to processing machines.
Animal Districts
Group your animal buildings together. This makes daily petting, collection (if no Auto-Grabber), and feeding more efficient.
- Fencing: Use durable fencing (Stone, Iron) to keep animals contained. They eat grass faster than it grows, so manage your grazing areas.
- Silos: Place 2-3 Silos near your animal buildings for easy access to Hay.
Bee Houses & Fish Ponds
These can be placed in less trafficked areas.
- Bee Houses: Place them near flowers for flavored honey (highest value next to Fairy Rose).
- Fish Ponds: Group these by the water. They're mostly "set and forget" once stocked. Sturgeon is best for Caviar.
Paths and Decoration
Paths are important for both aesthetics and speed.
- Speed Boost: Stone/Wood Paths increase your movement speed.
- Prevent Weeds: Paths prevent weeds, stones, and trees from spawning.
- Customization: Mix and match different path types (Stone, Wood, Crystal) to create unique designs.
- Fences: Use fences to delineate areas. Hardwood fences last the longest.
Pro Tips for Layout
- Use the Planner Tool: Stardew Valley Planner (a web-based tool) lets you design your farm before committing in-game.
- Keep Shipping Bins Close: Place 2-3 extra Shipping Bins near active farming areas for quick sales.
- Plan for Expansion: Always leave room for future buildings like Sheds, Barns, and Coops.
- Don't Over-Clear: Leave some trees and grass for aesthetics and resource regeneration if you're not using them.
- Sprinkler Efficiency: Maximize area by placing Iridium Sprinklers adjacent to each other.
Related on StardewHub
- Which Farm Map to Pick — Choose the right foundation for your layout.
- Greenhouse Guide — Your ultimate goal for year-round crops.
- Animals Guide — Plan your animal zones with this.
- Most Profitable Crops — Decide your crop layout based on ROI.
A perfectly optimized farm layout in Stardew Valley is a journey, not a destination. It evolves with your progress, but starting with a solid plan saves you countless headaches. Plan smart, build efficiently, and watch your farm flourish.
Updated for Stardew Valley 1.6.