Stardew Valley Community Center Guide — Finish Fast (1.6)
Don't let your Stardew Valley Community Center restoration drag into Year 2. This fast 1.6 guide has season-by-season checklists, missable items, and pro tips.
Restoring the Community Center is the biggest milestone of Year 1. If you don't want to wait until Year 3 just because you forgot a single Spring crop, follow this checklist closely. This guide covers every bundle, every item, and the fastest way to complete them all, even with the new 1.6 changes. We'll make sure you get that Greenhouse ASAP!
Quick Summary
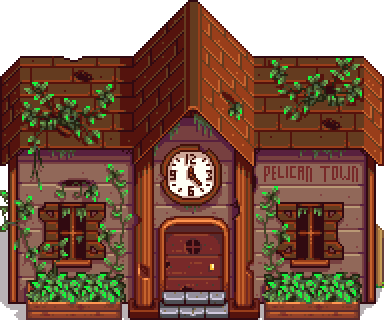
- 6 areas: Crafts Room, Pantry, Fish Tank, Boiler Room, Bulletin Board, Vault
- 23 bundles: Each bundle needs specific items — most are seasonal
- Key reward: Greenhouse (Pantry) — grow any crop year-round
- Fastest completion: Spring → Summer → Fall → Winter (Year 1)
- Missable items: Some fish and crops are season-specific — plan ahead
How the Community Center Works
After the first day, you'll get a cutscene at the Community Center. A Junimo (forest sprite) will appear and give you a golden scroll. Each bundle requires a specific set of items. Donate all items in a bundle → the Junimos repair that part of the center, unlocking rewards. The ultimate goal is to restore the entire building.
Alternative: You can choose the "Joja Route" instead — pay 13,500g to Joja Mart to have them "fix" the center. This skips the bundles but loses all the unique rewards and story elements. Most players prefer the Community Center route for the rewards and the authentic Stardew Valley experience.
Area 1: Crafts Room (Forest)
Located in the western wing. Requires foraged items and crafted goods.
Exotic Foraging Bundle
| Item | Location | Season |
|---|---|---|
| Spring Onion | South of farm | Spring |
| Wild Horseradish | Forest, Mountain | Spring |
| Daffodil | Forest, Mountain | Spring |
| Leek | Forest, Mountain | Spring |
| Snow Yam | Mines, Mountain | Winter |
| Crocus | Mountain | Winter |
| Crystal Fruit | Mines (frozen levels) | Winter |
| Red Mushroom | Mines (lower levels) | Any |
| Purple Mushroom | Mines (lower levels) | Any |
Save wood from farm clearing and buy or mine stone early so you can turn in this bundle without halting farm infrastructure.
Construction Bundle
| Item | Quantity | Source |
|---|---|---|
| 99 Wood | 99 | Chop trees everywhere |
| 99 Stone | 99 | Mine rocks (anywhere) |
| 10 Hardwood | 10 | Secret Woods or Mahogany trees |
Area 2: Pantry (Farm)
Located in the eastern wing. Requires crops and animal products. Important: Completing the Pantry unlocks the Greenhouse — the most powerful building in the game.
Spring Crops Bundle
| Item | Seed Source | Growth Time |
|---|---|---|
| Parsnip | Pierre's Shop | 4 days |
| Green Bean | Pierre's Shop | 10 days |
| Cauliflower | Pierre's Shop | 12 days |
| Potato | Pierre's Shop | 6 days |
Plant melon and blueberry seeds on Summer 1 to ensure enough time for multiple harvest cycles before fall.
Summer Crops Bundle
| Item | Seed Source | Growth Time |
|---|---|---|
| Tomato | Pierre's Shop | 11 days |
| Blueberry | Pierre's Shop | 13 days |
| Hot Pepper | Pierre's Shop | 5 days |
| Melon | Pierre's Shop | 12 days |
Pumpkins and yams should be prioritized in fall for bundle completion and processing into valuable artisan goods.
Fall Crops Bundle
| Item | Seed Source | Growth Time |
|---|---|---|
| Corn | Pierre's Shop | 14 days |
| Eggplant | Pierre's Shop | 5 days |
| Pumpkin | Pierre's Shop | 13 days |
| Yam | Pierre's Shop | 10 days |
Quality Crops Bundle
Requires 5 Gold-quality versions of specific crops:
- Parsnip (Gold): Plant 10+ in Spring, fertilize with Basic Fertilizer
- Melon (Gold): Plant 10+ in Summer, fertilize
- Pumpkin (Gold): Plant 10+ in Fall, fertilize
- Corn (Gold): Plant 10+ in Fall, fertilize
Tip: Plant extra crops and use Scarecrows to protect from crows. Quality depends on farming level and fertilizer. Don't forget your sprinklers to keep them watered!
Animal Bundle
| Item | Source | Requirement |
|---|---|---|
| Large Milk | Cow | Deluxe Barn + Happy Cow |
| Large Egg (White) | Chicken | Deluxe Coop + Happy Chicken |
| Large Egg (Brown) | Chicken | Deluxe Coop + Happy Chicken |
| Large Goat Milk | Goat | Deluxe Barn + Happy Goat |
| Wool | Rabbit | Deluxe Coop + Happy Rabbit |
| Duck Egg | Duck | Deluxe Coop + Happy Duck |
| Duck Feather | Duck | Deluxe Coop + Happy Duck |
| Rabbit's Foot | Rabbit | Deluxe Coop + Happy Rabbit (rare) |
Area 3: Fish Tank (Beach)
Located in the southern wing. Requires fish and ocean items. This is the hardest area to complete because some fish are seasonal and hard to catch.
River Fish Bundle
| Fish | Location | Season | Time |
|---|---|---|---|
| Sunfish | River (Town) | Spring, Summer | 6am-7pm |
| Bream | River (Town) | Any | 6pm-2am |
| Smallmouth Bass | River (Town) | Any | Any |
| Chub | Mountain Lake | Any | Any |
Visit the beach pier during morning and evening windows to catch high-difficulty ocean bundle fish like the Pufferfish.
Ocean Fish Bundle
| Fish | Location | Season | Time |
|---|---|---|---|
| Sardine | Ocean | Any | 6am-8pm |
| Tuna | Ocean | Summer, Winter | 6am-7pm |
| Red Snapper | Ocean | Fall, Winter | 6am-8pm |
| Squid | Ocean | Winter | 6pm-2am |
The Mountain Lake offers reliable catches year-round, making this one of the quickest fishing bundles to complete.
Lake Fish Bundle
| Fish | Location | Season | Time |
|---|---|---|---|
| Largemouth Bass | Mountain Lake | Any | Any |
| Carp | Mountain Lake, Mines | Any | Any |
| Catfish | River (Town) | Spring, Fall | 6am-8pm |
| Pufferfish | Ocean | Summer | 12pm-4pm |
Head to the river after 6 PM during rainy days to catch the elusive Walleye and finish the Night Fishing collection.
Night Fishing Bundle
| Fish | Location | Season | Time |
|---|---|---|---|
| Walleye | River, Lake | Fall | 5pm-2am |
| Bream | River | Any | 6pm-2am |
| Eel | Ocean | Spring, Fall | 4pm-1am |
| Octopus | Ocean | Summer | 6am-1pm |
Area 4: Boiler Room (Mines)
Located in the northeastern wing. Requires minerals, ores, and monster drops.
Blacksmith's Bundle
| Item | How to Get |
|---|---|
| Copper Bar | Smelt 5 Copper Ore + 1 Coal |
| Iron Bar | Smelt 5 Iron Ore + 1 Coal |
| Gold Bar | Smelt 5 Gold Ore + 1 Coal |
| Iridium Bar | Smelt 5 Iridium Ore + 1 Coal |
| Refined Quartz | Smelt Quartz or recycle Glass |
Crack open regular, frozen, and magma geodes at Clint's blacksmith shop to gather required earth crystals and fire quartz.
Geologist's Bundle
| Item | How to Get |
|---|---|
| Earth Crystal | Geodes, Mines |
| Fire Quartz | Mines (80+) |
| Frozen Tear | Mines (40-79) |
| Omni Geode | Mines, Skull Cavern |
| Topaz | Mines, Geodes |
| Aquamarine | Mines, Geodes |
| Amethyst | Mines, Geodes |
| Emerald | Mines, Geodes |
| Jade | Mines, Geodes |
| Diamond | Mines, Geodes |
| Ruby | Mines, Geodes |
Slay bats, slimes, and dust sprites in the mines to collect essential monster loot for the Adventurer's reward.
Adventurer's Bundle
| Item | Quantity | Source |
|---|---|---|
| Slime | 99 | Kill Slimes in Mines |
| Bat Wing | 10 | Kill Bats in Mines |
| Solar Essence | 10 | Kill Ghosts in Mines |
| Void Essence | 10 | Kill Void Spirits in Mines |
| Coal | 10 | Kill Dust Sprites, mine rocks |
| Bone Fragment | 10 | Kill Skeletons in Skull Cavern |
| White Algae | 10 | Fish in Mines |
Area 5: Bulletin Board (Forest)
Located in the northwestern wing. Requires gathered items and cooked dishes.
Chef's Bundle
| Item | How to Get |
|---|---|
| Maple Syrup | Tappers on Maple Trees (9 days) |
| Oak Resin | Tappers on Oak Trees (7 days) |
| Pine Tar | Tappers on Pine Trees (5 days) |
| Fiddlehead Fern | Cindersap Forest (Summer) |
| Truffle | Pigs dig them up |
| Pufferfish | Ocean (Summer, 12pm-4pm) |
| Truffle Oil | Preserve Truffle in Oil Maker |
| Coffee Bean | Blackberry Bushes (Spring), Traveling Cart |
| Poppy | Summer crop |
| Super Cucumber | Ocean (Summer, 6am-1pm) |
| Red Cabbage | Traveling Cart (rare) |
Collect red cabbage and sea urchins throughout the year to fill the Dye pot requirements without waiting for year two.
Dye Bundle
| Item | Color | Source |
|---|---|---|
| Red Mushroom | Red | Mines, Forest |
| Sea Urchin | Red | Ocean (forage) |
| Poppy | Red | Summer crop |
| Red Cabbage | Red | Traveling Cart |
| Hot Pepper | Red | Summer crop |
| Beet | Red | Desert (Fall crop) |
Area 6: Vault (Desert)
Located in the southeastern wing. Requires gold payments. This is the easiest area — just pay money.
Vault Bundles
| Bundle | Cost | Reward |
|---|---|---|
| 2,500g Bundle | 2,500g | Glittering Boulder removed → Minecart access |
| 5,000g Bundle | 5,000g | Bus repair → Desert access |
| 10,000g Bundle | 10,000g | Bridge repair → Shortcut to Quarry |
| 25,000g Bundle | 25,000g | Earthquake → Unlock Skull Cavern |
Total cost: 42,500g. Save up in Summer/Fall to pay these off quickly.
Fastest Completion Order
- Spring Year 1: Focus on Spring Crops Bundle, River Fish Bundle, and Crafts Room. Plant Parsnips, Green Beans, Cauliflower, and Potatoes immediately.
- Summer Year 1: Focus on Summer Crops Bundle, Ocean Fish Bundle, and start animal buildings (Barn + Coop). Plant Tomatoes, Blueberries, Hot Peppers, Melons.
- Fall Year 1: Focus on Fall Crops Bundle, Quality Crops Bundle, and start tappers for Maple Syrup/Oak Resin. Plant Corn, Eggplant, Pumpkins, Yams.
- Winter Year 1: Focus on fish bundles (Night Fishing, Lake Fish), Boiler Room, and Vault. Fish at night for Walleye and Eel.
- Year 2 Spring: Finish remaining bundles — usually animal products (need Deluxe Barn/Coop) and rare items (Red Cabbage from Traveling Cart).
Missable Items (Plan Ahead!)
- Red Cabbage: Only from Traveling Cart (rare) — buy it when you see it!
- Rabbit's Foot: Need Deluxe Coop + Happy Rabbit — takes time to build
- Pufferfish: Summer only, 12pm-4pm, ocean only — don't miss it
- Walleye: Fall only, 5pm-2am — fish at night in Fall
- Truffle: Need Pigs — build Deluxe Barn ASAP
- Fiddlehead Fern: Summer only, Cindersap Forest — forage in Summer
Community Center Rewards
| Area | Reward |
|---|---|
| Crafts Room | Forest Spirit — free foraged items daily |
| Pantry | Greenhouse — grow any crop year-round |
| Fish Tank | Water Spirit — free fish daily |
| Boiler Room | Minecart fast travel system |
| Bulletin Board | Friendship boost with all villagers |
| Vault | Bus repair → Desert access |
The Greenhouse is the #1 priority. It lets you grow Ancient Fruit, Starfruit, and other high-value crops year-round. Complete the Pantry first if possible.
Common Mistakes
- Ignoring seasonal fish: Some fish only appear in specific seasons. Check the calendar and fish schedule.
- Not buying Red Cabbage from Traveling Cart: This is the #1 reason people can't finish in Year 1. Buy it when you see it!
- Skipping animal buildings: You need a Deluxe Barn and Deluxe Coop for animal products. Start building early.
- Not using Tappers: Maple Syrup and Oak Resin take 7-9 days to produce. Start tappers in Spring.
- Forgetting the Vault: The Vault requires 42,500g total. Start saving in Summer.
Related on StardewHub
- Complete Fishing Guide — Catch every fish you need for the Fish Tank bundles.
- Greenhouse Guide — How to use the Greenhouse reward for maximum profit.
- Daily Planner — Track which fish and crops are available today.
The Community Center is a marathon, not a sprint. Plan your seasons, buy Red Cabbage from the Traveling Cart, and focus on the Greenhouse first. Once you complete it, the rewards make everything easier. Good luck!
Updated for Stardew Valley 1.6.